How Do You Create A Group On Facebook
By
Dany Firman Saputra
—
Thursday, June 27, 2019
—
Create Facebook Group

Groups are implied to be a close circle of individuals that share as well as interact on Facebook.
Individuals have a tendency to create them around things like:
- Topics
- Books (think of it like a book club).
- Their business (sort of like an "insider's club").
- To sell items locally.
- Exclusive membership site.
- Support groups.
There is no "Incorrect" subject for a Group IMHO. Everything depends upon your:.
- Goals.
- Focus.
- Business.
- Topic.
When you figure out why you wish to make use of one and just how it will aid promote as well as support one or several of the above, it's time to develop your very own Facebook Group. As well as it's easy!
How Do You Create A Group On Facebook
1. Find "Add Group".
From your "homepage" on Facebook most likely to the Explore - Groups area on the left side menu and also click, "Groups."
As soon as you arrive, it will certainly look like this:.

2. Click "Create Group".
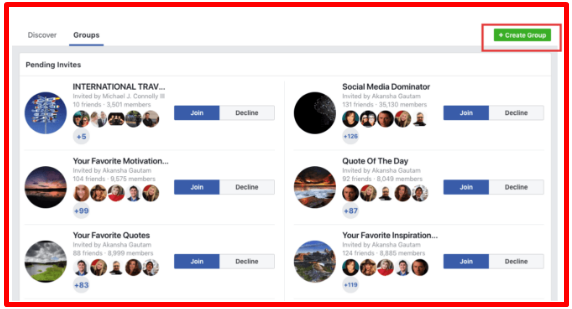
You'll be taken to a page that shows the alternative to produce a group as well as revealing you some:.
- Pending Invites.
- Favorites.
- Your Groups.
- Groups You Manage.
To start the procedure of developing a Group, click "Produce Group" in the top right hand edge.
>> Facebook also offers an alternate way to create a new group
Right of your name as well as the notices bell in the right-hand man edge, click on the fall and select, "Create Group."

As soon as you pick that alternative, a lightbox will certainly open up where you can start to add your Facebook group details.

3. Name Your Group.
The first thing you require to do is give your Group a name-- I'm naming my Group "Scott Secret Group".
This name can be whatever you desire and also you can alter it later on. Yet try to make the group name remarkable and searchable-- so individuals can discover it.

4. Add Members.
Facebook does something odd right here-- as well as out of order, in my point of view.
You're actually needed to include at least 1 close friend to the Group prior to you can develop it. If you do not you obtain the mistake message below:.

So in order to develop your Group, you'll need to include at least 1 buddy to the Group.
5. Choose Privacy Setting.
You'll currently need to choose what privacy setting you want your group to have.
This is probably the most essential option you'll make while developing your Group-- as there are some limits to transforming down the road.

If you have less than 5000 participants you'll have the ability to transform the settings as you see fit.
But as quickly as your groups grows to over 5000 members, you can just transform an Open group to Closed or Secret-- and a Closed group to Secret.
You will not be able to change the privacy once more hereafter.
There can be complication concerning what personal privacy setting a Group should have-- Open, Closed or Secret.
It's rather self explanatory as seen above-- however below's one more great visuals from Facebook to break it down:

6. Click Create.
After you choose your privacy setting, click the "Create" switch as you have actually seen in previous photos:.

7. Add Your Cover Image.
Facebook will now give you the option to include your innovative visuals for your header or cover image.
This is completely up to you as well as need to be straightened with your present brand or the theme of your group.

However if you have actually produced numerous Groups or have numerous Groups in your favorites, you'll wish to pick an image that differentiates each of them.
Remember: the measurements for this cover photo are different from those on your individual Timeline or organisation Web page.
You wish to utilize 1640 x 856 pixels for your Group cover image.
8. Complete "About" Section.
Your about section is essential for 2 reasons:.
- Provides potential members a suggestion what your Group has to do with.
- Can display any kind of "rules" you may have about the Group.
So load it out as you choose-- seeing as this is YOUR Group.
10. Edit Group Settings.
Next you'll wish to edit the group setups.
You do this by clicking the "More" tab and then clicking "Edit Group Settings":

As soon as on the edit page, you'll have lots of options to transform:

Items you can alter:.
- Group Name.
- Group Type.
- Description.
- Tags.
- Locations.
- Linked Pages.
- Privacy Settings.
- Membership Approval-- Do you intend to allow anybody include members or should only you be able to?
- Set a Group Address-- Here you'll have a chance to give the Group a customized link along with an email address where individuals could email the Group directly.
- Change your Description.
- Change Posting Permissions-- Right here you can determine if only admins can publish or if participants can too.
- Post Approval-- You can require that all articles be authorized by an admin before going online.
As soon as you're done as well as satisfied with the setups, click "Save1".
Your Group is Ready to Go!
You have actually now efficiently produced a Facebook Group! Congratulations!
Currently you can upload updates inside the groups-- therefore can members (if you've permitted it).
A Couple Of Group Attributes to Mention.
Alerts- As an admin you must possibly transform the notices on obtain all updates when any individual blog posts-- just in case somebody spams the group & you want to react promptly:.

Messages/Chat- Among the terrific aspects of Groups is you can launch a Group chat/message with either all participants of a group or choose participants.
This is specifically beneficial when you have a statement to make or need to rapidly collaborate on an item/issue.
Events- A feature possibly not utilized typically sufficient in Groups is Events. Inside the group you can produce occasions that just participants can see & RSVP for.
Just click the "Events" tab to the left and then "Develop Occasion" & the lightbox below will pack to produce your occasion.
Files- Inside Groups you can share data of any kind of kind in addition to produce Files which group participants can add to & Group up on.
Think of this as your own little office within Facebook-- or possibly a substitute for apps like Basecamp or Dropbox.
Final Thoughts
Now that you've read this article, ideally you can currently efficiently create a Group by yourself.
On a future message I'll debate whether you ought to have a Facebook Account, Web Page or a Group for your company... or perhaps all of the above!